
I love
snowmen. They say winter in that fresh,
fluffy snow way – not the cold, mushy, slippery way. So these cookies just make me smile, want to pull out my
skates, grab a hot chocolate and embrace the winter.
Last year I made
gingerbread boys, girls and snowmen inspired by Bakerella, one of my favorite
bloggers. Last week I was making
cookies for a baby naming similar to ones made by Bridgette from Bake at 350. And then I thought I think I can
combine the two styles to come up with my new favorite cookie ever – and it’s
very Flour Child.
You can be as
simple snowmen or fancy pants as you want with these cookies and here is how I
did it.
Materials
Needed for Decorating:
- large square cookie cutter (I used the large square scalloped one from Copper Gifts) – it is such a great cookie cutter that can be
used in a kazillion different ways)
- gel past to colour some of the royal icing (I
used royal blue)
- royal icing – as always, I really like the Ateco
meringue powder
- piping bags
- sprinkles, coloured Tic Tacs and food writing pens
Instructions
and Tips:
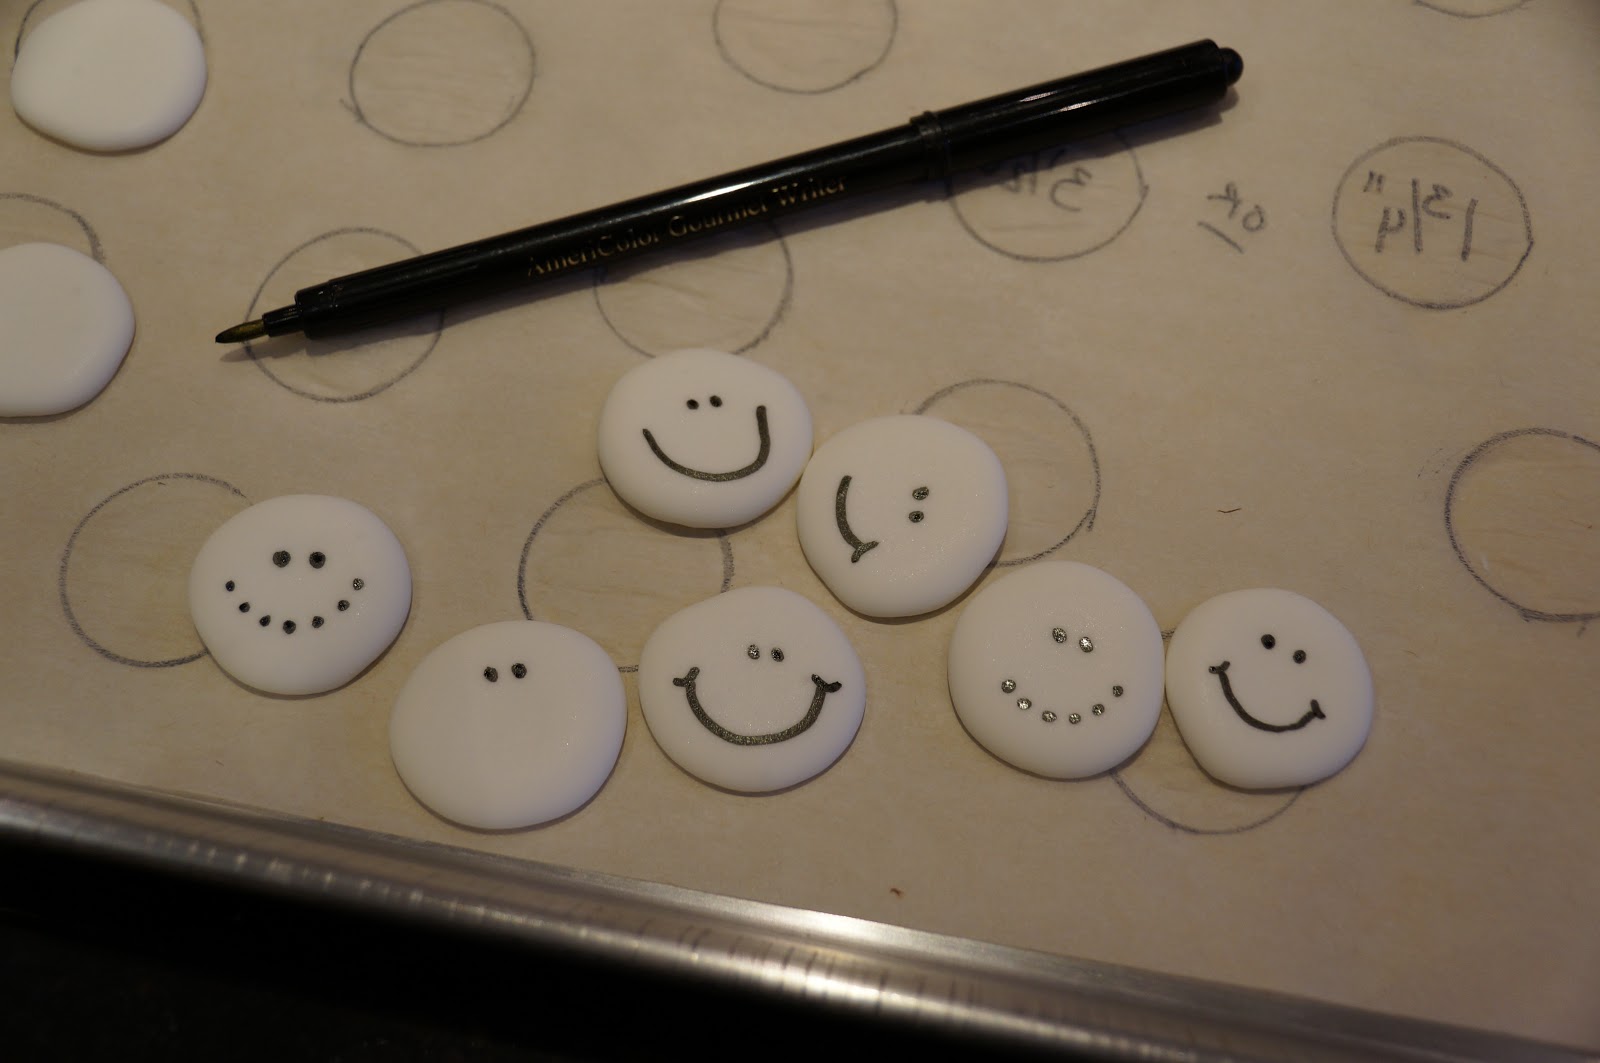
To make the snowmen heads. Draw circles on a
piece of parchment paper. I used a
Sharpie and drew circles around 1¾” or 3½ cm.
Flip the paper over and trace with royal icing. Let them dry overnight.


Use a food writer to draw on the eyes and mouth.


Use your favorite sugar cookie recipe and cut out the squares.
Outline each
cookie with white royal icing
 Fill or flood the
cookies. I like using the squeeze
bottles because it is so much cleaner then a piping bag when flooding cookies.
Fill or flood the
cookies. I like using the squeeze
bottles because it is so much cleaner then a piping bag when flooding cookies.


Use a toothpick or
bamboo skewer to pull the icing to fill the cookie. If you just use the squeeze bottle there is a chance that
you will overflood the cookie – it is always a fine line between the perfectly
flooded cookie and a cookie that is over flowing with icing. The toothpick “pull” really helps
ensure an evenly flooded cookie.
Want another
trick? I use a Silpat when
decorating cookies so they don’t slip around.
Place the snowman head in the centre of the flooded cookie. I also used a few little snowflake sprinkles that I found at the local bulk food store.

Place the snowman head in the centre of the flooded cookie. I also used a few little snowflake sprinkles that I found at the local bulk food store.

Let the cookies
dry overnight.
PME 1.5 is my favorite writing tip so I used it to write "Let It Snow" on each cookie.

I love the way these cookies turned out.

Now I'm just waiting for it to snow (sorta).
This comment has been removed by the author.
ReplyDeleteThese are really cute! I love snowmen also...I'm definitely going to do this. Really appreciate the tutorial because I would have done it in a more complicated way!! Thanks!
ReplyDeleteJudy -- will you post your snowman cookies on my Facebook page? I would love to see them.
DeleteSure! They won't be as lovely as these, but they'll taste good!
DeleteThanks Sue! Think I may need to make your carrot nose cookies for a winter slating party on February;)
ReplyDelete