Friday, September 28, 2012

Turkey Legs for Dessert


Canadian Thanksgiving is next weekend – Monday October 8 to be exact.  Of course when you think of Thanksgiving, you think of turkey.  Everyone eats turkey for Thanksgiving right?  And, everyone gets stuffed on turkey and stuffing and potatoes and that green bean dish… and has no room for dessert. 

Well this year, I’m just combining the whole dinner into these drumstick cookies* and calling it a super cute Thanksgiving.

This year I feel very thankful for my family and old and new friends and, my dogs and generally pretty nice life.

What are you thankful for this holiday?

Happy Thanksgiving!


*I got the cookie cutter from CopperGifts – it’s the drumstick #1206. 


Sunday, September 23, 2012

Brunch!


I love brunch.  I’m not sure if it is because it is the perfect time for a meal or because it’s a casual meal with friends or simply because brunch is usually on the weekend.

I made these bacon, eggs & bacon cookies and think they are a perfect addition to my favorite meal.

Thursday, September 20, 2012

Lipstick Cookie Kiss


Just one question – do you wear pink or red lipstick?

Love these lipstick cookies for girls night out or fifties themed party.


Thursday, August 30, 2012

Back-To-School Browner Brownies


When I was growing up (way way back when dinosaurs roamed the earth) we called the kids who sucked up to the teacher “browners”.  Now I have also heard terms like teachers pets, brown nosers, nerds, keeners … but in truth I think these names simply refer to the SMART KIDS! 

I’m so SMART that I decided to embrace my inner keener and make something to suck up to all of you.  I came up with these totally awesome BROWNER BROWNIES.  I love them because they have a graham crust, chocolate chocolate brownies and are drizzled with caramel.  Seriously, how keen am I?

Back-To-School can be a hard time – getting organized, waking up early, new schedules, car pool, making lunches never mind the pressure for kids with new grades, schools, friends & teachers AND the right outfit…so I was thinking if you bake these this weekend they may make next week a little sweeter. 

These are great because they are something that you can put in a litterless, nut free (how politically correct am I?) lunchbox or have for a pick-me-up after school snack.

And here is how I made them...

Ingredients

Crust
4 ½ cups graham cracker crumbs
1 ½ cups unsalted butter melted

Brownies
2 2/3 cups all purpose flour (you know I only use Five Roses)
2 tsp baking powder
1 tsp salt
8 oz unsweetened chocolate
1 cup unsalted butter
8 eggs (room temperature is best if possible)
4 cups sugar
3 tsp vanilla extract

Topping
Your favorite caramel sauce

Directions

Preheat oven to 350o or 325o if using a bake/convection setting.

Crust

Combine graham cracker crumbs with melted butter in a bowl – I always use a wooden spoon when lots of melted butter is involved.

Press firmly into 13 x 18 cookie sheet with a rim.  You don’t really need to grease the pan but I often will spray with Bakers Joy just to make cutting WAY easier.

Brownies

Combine flour, baking powder and salt in a bowl and set aside.

In a saucepan or over a double boiler melt chocolate and butter until smooth.  Remove from heat and let cool at least 10 minutes.

Beat eggs until fluffy (at least 3 minutes) and add sugar, gradually, until really fluffy (another 3 minutes).  Add cooled chocolate mixture and mix well.  Then add the flour mixture and vanilla until combined.  NOTE: It’s such a big recipe that I stirred it from the bottom and then mixed it more.

Pour batter on pressed graham crust.

Bake 30 – 35 minutes.

Do not over bake brownies (EVER;)

When cooled cut and drizzle with caramel sauce.  (NOTE:  I used a square cookie cutter to cut the brownies but you don’t really need to be so “fancy” – a good old knife works perfectly.)

This yields lots of browner brownies so maybe BE SMART and invite some old and new school friends over to celebrate (or commiserate – hey I’m not totally deluded) this 2012/13 back-to-school year.

HAPPY BACK TO SCHOOL!

Tuesday, June 26, 2012

Maple Sandwich Cookies


These cookies taste like maple syrup and make you want to start singing Oh Canada!  We have a great national anthem so why not belt it out especially because this weekend is Canada Day. 

Sandwich cookies look more complicated then they really are.  I used a smaller maple leaf cookie cutter because let’s not forget it really is two cookies sandwiched between butter cream – and in this case maple butter cream – so there is NO WAY anyone can eat just one so if they are smaller maybe they won’t feel bad eating two or three…

They really should be called Maple MAPLE Sandwich Cookies because they are super mapley and super yummy.

I made them as part of my S’more dessert table and here is how I made them.

Ingredients

Cookies:
1 cup butter, room temperature
1 cup firmly packed brown sugar
¼ cup maple syrup
1 egg
1 tsp maple extract
3 ¼  cups all-purpose flour
½ tsp baking powder
½ tsp salt

Maple Butter Filling:
¼ cup butter, room temperature
2 cups icing sugar
2 tbsp whipping cream (or regular cream or 5% cream or milk)
2 tsp maple extract

Directions & Tips

Cookies:

In a large bowl, beat butter with brown sugar until fluffy; beat in maple syrup, egg & maple extract.

In separate bowl, whisk together all-purpose flour, baking powder and salt; stir into butter mixture until dough is smooth.

Wrap dough into plastic wrap and refrigerate until firm, 1 hour or this could be your “make ahead” and you can refrigerate overnight.

Heat oven to 3500.

Roll out dough.  Using a maple leaf cookie cutter, cut out cookies.  I used the smallest maple leaf from this Wilton Leaves & Acorn nesting set I have.

Place cookies on parchment lined cookie sheets.

Bake at 350o  oven, rotating pans halfway through, until golden on bottoms and edges are darkened, 10 to 12 minutes.  Transfer cookies to racks; let cool.

Maple Butter Filling

In small bowl, beat butter until fluffy; beat in sugar, cream (or milk) and maple extract until smooth.

I used a piping bag but you could simply spread about 1 tsp of maple butter filling on the bottoms of half of the cookies and then sandwich bottom side down with remaining cookies.

If you make these, don't forget to let me know what you think.

Sing OH CANADA or some other Canadian song* and have a great long weekend.

* also I would like to know what you sang


Saturday, June 2, 2012

Father's Day - Tie One On


It is Father’s Day is on June 17.  That means that kids everywhere will be out making cards and purchasing ties and shirts for their Dads.  Well at least that is what I usually did for my Dad.  I wish my Dad was still here so I could get him a polka dot tie (which I would say to wear with a solid shirt and check pants or a striped shirt and solid pants;) or to make him these cookies.  He is in my heart, always.

I came up with this idea cookie and recruited some friends to help me make these super cute cookies (and the kids are pretty cute too).  I love the idea because I really think everyone is an artist and these cookies are pretty simple to make and colour.

And here is how I did it – with some help from my friends.

Materials Needed for Decorating:
 
- neck tie shaped cookie cutter
- royal icing – as always, I really like the Ateco meringue powder
- piping bags
- food writing markers

Instructions and Tips:

Use your favorite sugar cookie recipe and cut out the neckties.

Outline each cookie with royal icing.
 
Fill or flood the cookies.  I like using the squeeze bottles because it is so much cleaner then a piping bag when flooding cookies.
Use a toothpick or bamboo skewer to pull the icing to fill the cookie.  If you just use the squeeze bottle there is a chance that you will overflood the cookie – it is always a fine line between the perfectly flooded cookie and a cookie that is over flowing with icing.  The toothpick “pull” really helps ensure an evenly flooded cookie.

Want another trick?  I use a Silpat when decorating cookies so they don’t slip around.

Let the cookies dry overnight.

Once the cookie is dry, the fun begins – and really I think this is fun for anyone - young or old, artistic or not, willing and those a bit resistant to the idea of decorating cookies. 

Using food writers draw on stripes, polka dots, words, letters…really you can take this as far as your imagination will take you.  


Each cookie can be so personal - like the one with the ZZZZ's "Because my Daddy snores, ALOT".


Filling in white spaces is always a good idea.


Keep it simple and say it as it is


Have fun with this activity.


I’m sure your Dad will love the thoughtfulness these ties.  The best thing about them is he does not have to worry if the pattern is not his thing because these ties don’t have to match with anything they are simply yummy. 


Thanks to all my friends who did such a great job decorating these cookies.


HAPPY FATHER'S DAY!


Wednesday, May 16, 2012

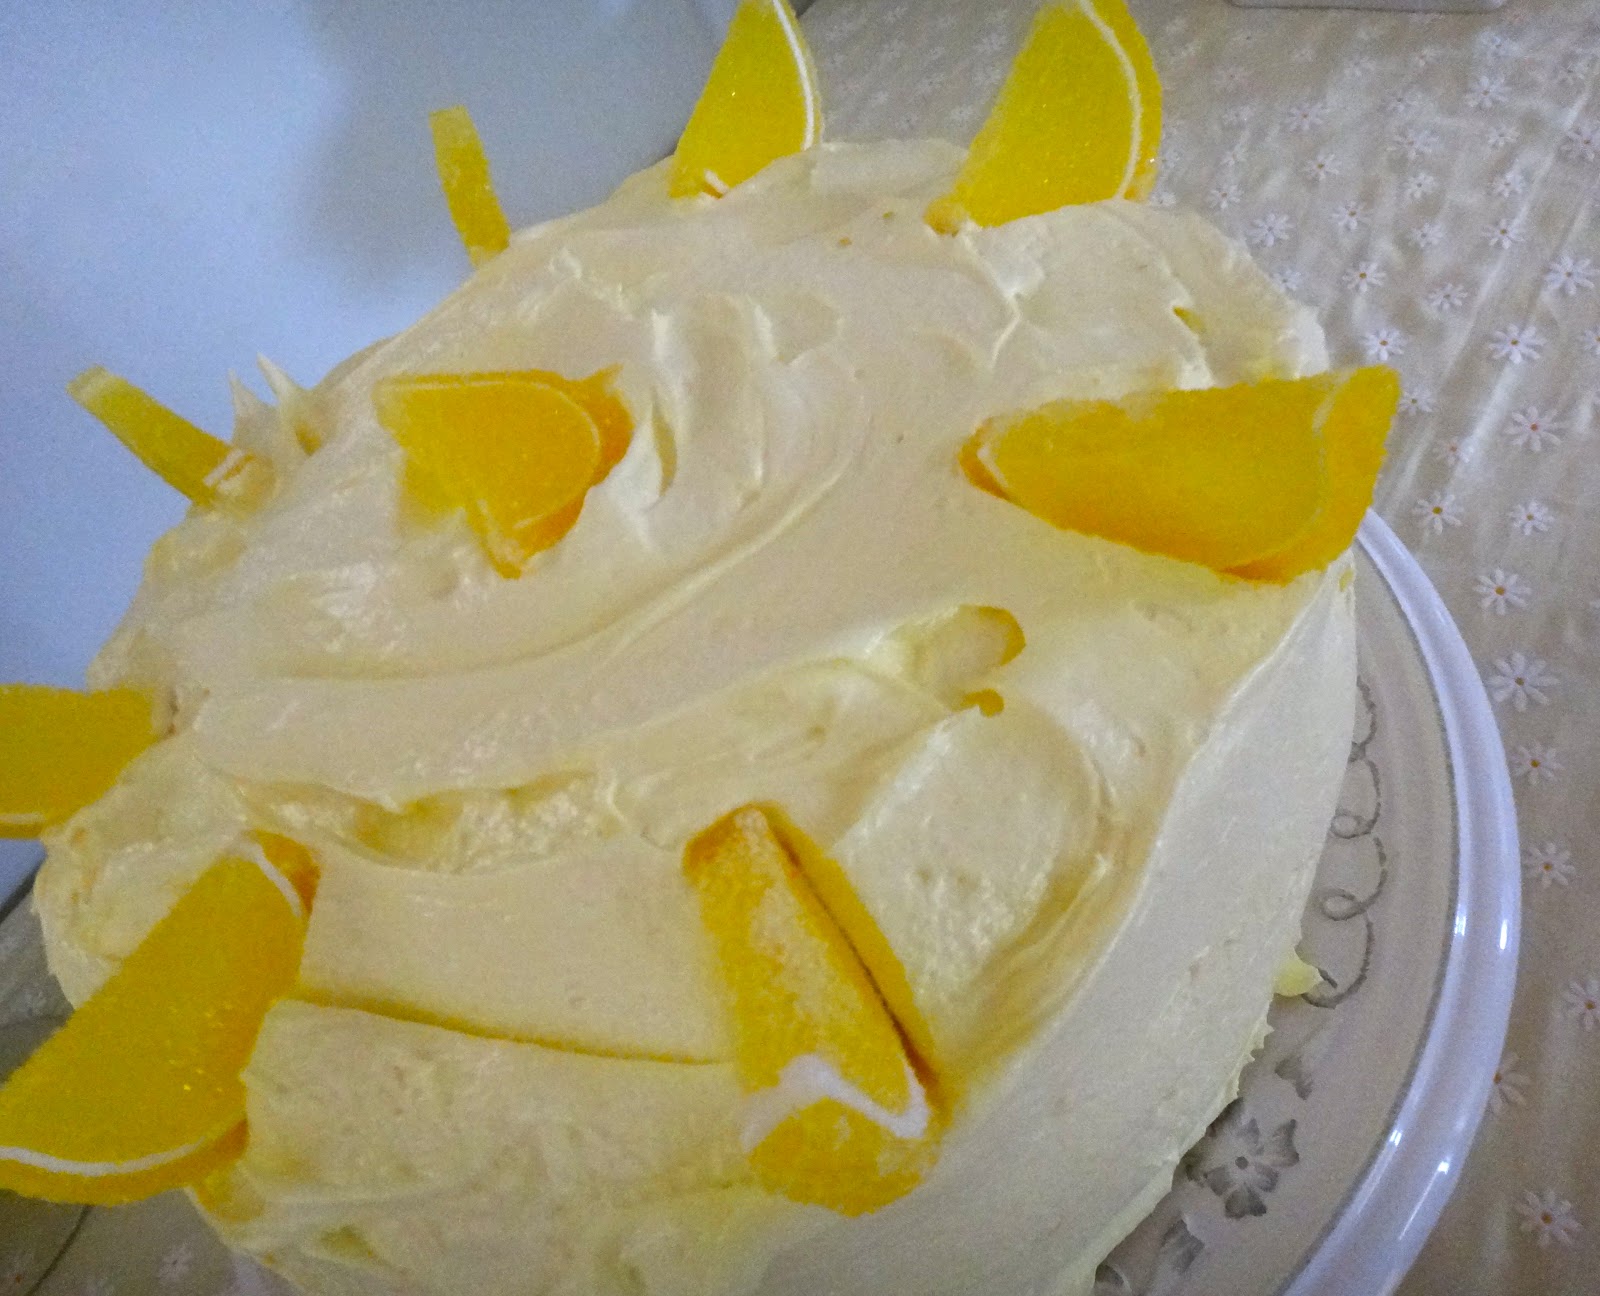
Lemon Lemon Cake


What is it about a lemon that makes me think of fresh and light?  Not sure I would call this cake light but I would call it fresh and fluffy and tangy and yummy.

I made this for as part of my Mother’s Day brunch for dinner.  It fit in well with my yellow themed dessert table but I could have just as easily left the frosting white and it would have looked and tasted equally as delicious. I did not use lemon oil in the frosting because between the cake and the curd filling, I thought it was enough lemon.

I had really wanted to post it before Mother’s Day but somehow time got away from me.  I’m pretty sure a lot of the time was spent hunting down yellow candy, sewing the yellow banner and yellow tablecloth and not blogging … but I digress.

It’s a great all year round special occasion cake. 

And here is how to made it….

Ingredients

LEMON CAKE


1 cup unsalted butter (room temp)
2 cups sugar
4 large eggs
1½ cups self-rising flour*
1¼ cups all-purpose flour
¾ cup milk (I used 1%)
¼ cup fresh lemon juice
2 tsp grated lemon rind


LEMON CURD FILLING

12 egg yolks
3 TBSP lemon zest
1 cup fresh lemon juice
1 ½ cups sugar
1 cup butter (cut into 1 tbsp pieces)


[NOTE:  I always grate the lemons and then squeeze them -- and I do this before I get all the other ingredients together.]


FLUFFY ICING

3 egg whites
½ cup cold water
1 ½ suagar
½ tsp cream of tartar
[food gel if you want to colour the icing]

Directions & Tips

LEMON CAKE

Preheat oven to 350o.

Grease and lightly flour two or three 9” round cake pans.  I use a cake release by Pillsbury that has flour in it – it is clean and easy and works like a charm.

In a large bowl, on a medium speed of an electric mixer, cream butter.  Add sugar gradually and beat until fluffy, three to five minutes.  Add eggs one as a time.  Combine the flours and add in four parts, alternating with milk and lemon juice and zest, beating well after each addition.  Divide the matter among the cake pans.  Bake for 20 to 25 minutes or until a cake tester inserted into the centre of the cake comes out clean.  Let cakes cool in pans for 10 minutes. Remove from pans and cool completely on wire rack.  I actually made my cake the day before and wrapped in saran wrap. 

Spread the curd evenly between layers (you may have extra curd which is great with toast) and use the icing for the top and sides.  [NOTE: if you want to skip the curd you can simply use the icing for the whole cake]

LEMON CURD FILLING

Whisk egg yolks, lemon zest, lemon juice and sugar in a saucepan until well combined.  Over a medium heat cook for about 20 minutes until the curd comes to a nice thick consistency.  You will need to stir constantly and watch carefully as the curd cooks.  Remove from heat and add butter one tablespoon at a time, stirring until it is melted and mixed in.  Refrigerate overnight until firm.

FLUFFY ICING

In a medium-size saucepan over high heat, combine the water with the sugar and the cream of tartar.  As the mixture begins to bubble stir to ensure the sugar is dissolved then let it come to a good boil (about 3 minutes) and remove from heat.

While the sugar is boiling, whip the egg whites until thick (about 2-3 minutes) with an electric mixer.

Without turning off mixer, pour the sugar mixture into the beating egg whites in a thin, steady stream.  Continue beating constantly, on medium-high speed until stiff peaks form but frosting is still creamy.  If you are adding colour add now a little at a time to get the colour you are looking for.  I made this cake a soft yellow.
This is an awesome icing that I use over and over again.  It beats up quite a bit so you can half it if you are using the lemon curd filling.

I added some lemon sugar candies around the cake and really liked the way it turned out.

If you make this cake, let me know your tips and tricks you used to impress your guests.