Friday, January 18, 2013

Healthier Granola


So in an effort to start the year on a healthy note, I made granola.  This granola is a pretty healthy version – it is full of whole grain oats, no salt nuts, a little healthy olive oil and does not have a ton of sugar.  What is great about this recipe is you can add whatever you want.  If you need a no-nut version – add more seeds, coconut and dried fruit.  If you love nuts chock it full o’ nuts.

This granola is super fantastic for breakfast with milk or yogurt (Greek yogurt is my favorite) or on it’s own for a little afternoon pick-me-up.

I’ve made it so many times since the new year began and here is how I made it.

Ingredients
3 cups old-fashioned rolled oats – I used large flakes
1/4 cup maple syrup
1/4 cup light tasting olive oil
1 tsp. vanilla extract
1 tsp. cinnamon

Add In Ideas – use as many as you wish or others that you can think of

1/4 cup walnuts, coarsely chopped
1/4 cup sliced almonds, coarsely chopped
1/4 cup cashews
1/4 cup pistachio nuts
1/4 cup shelled sunflower seeds
1/4 cup shelled pumpkin seeds
1/4 cup unsweetened coconut flakes – I like the big flakes (in fact I put some in that toasted and then added more raw at the end – but I really love coconut)
1/4 cup dried apricots, cut into pieces
1/4 cup dried cranberries

Directions
Mix first five ingredients in a bowl with whatever add ins you choose.

Place on foil lined baking sheet.

Bake 3500 for 15 to 20 minutes.  Half way thought, stir up and turn the baking sheet to ensure even baking.

Remove from oven and let cool on a wire rack.  Don’t forget if you want to add more raw coconut now is the time to do so.

I think this recipe is a healthy alternative BUT I provide this cautionary note -- it is quite addictive so if you are someone who can’t control themselves and is trying to start the year on a weight loss foot – don’t make it!

But if you do make it, let me know what you added.

Monday, January 14, 2013

2013 - Healthy Start


Trying to start the new year off on a healthy foot?

Don’t forget to strap on your running shoes and eat your veggies.

Monday, December 31, 2012

Happy New Year's - 2013!


Wishing you a year of health and peace, kindness and cookies.

I hope 2013 is overflowing with all your dreams come true.

Saturday, December 29, 2012

Keep Busy During The Hockey Strike Jerseys!


Are you depressed about the hockey strike?  Feeling bored watching curling – and please don’t get me wrong I really love watching curling but understand that not everyone shares this pastime.  There is a small ray of sunshine because the world juniors are on and according to news headlines there are some sparks of hope in the NHL talks this weekend.  But if you need something to occupy your time...

No worries.  I have a great project to keep you occupied until the strike is over.

I have made these sport jerseys for baseball, soccer and hockey.  I have made these with different names and numbers for a team party, the ones above were individually wrapped for table place cards at a Bar Mitzvah.  It is time consuming cookie but with no hockey to watch, you most probably have plenty of time on your hands I’m sure.  These are such a great cookie idea for the sports fans in your life.  They will love all the time you took to make them something unique and fun. Maybe they will forget about the whole NHL strike.

They are really fun to make and here is how I did it.

Materials Needed for Decorating:

- jersey or tshirt cookie cutter (I used the large Tshirt from Copper Gifts – one of my favorite and versatile cookie cutters)
- fondant
- gel past to colour some of the royal icing (I used royal blue)
- royal icing – as always, I really like the Ateco meringue powder
- piping bags

Instructions and Tips:

Use your favorite sugar cookie recipe and cut out the t-shirts.

Outline each cookie -- I used #2 tip and royal blue icing.
 
While the outline is drying, get your numbers cut and organized.  Colour the fondant if you need to, roll out and cut the numbers.  Set aside for use after the cookie is flooded.
NOTE:  I like the Satin Ice fondant and because I don't use often I usually use white and colour as I require but if you have coloured fondant so you can skip this step.  You might also have a shirt that is coloured so white numbers would look great.  One thing I should mention is that if you are want black or red numbers, buy the coloured fondant because it is not so easy to get a good red or black unless it is pre-made.

Fill or flood the cookies.  I like using the squeeze bottles because it is so much cleaner then a piping bag when flooding cookies.
Use a toothpick or bamboo skewer to pull the icing to fill the cookie.  If you just use the squeeze bottle there is a chance that you will overflood the cookie – it is always a fine line between the perfectly flooded cookie and a cookie that is over flowing with icing.  The toothpick “pull” really helps ensure an evenly flooded cookie.

Want another trick?  I use a Silpat when decorating cookies so they don’t slip around.

Using a slightly thiner royal icing than the outline, add details on the sleeve and bottom of the Tshirt.

Carefully place the fondant numbers on the Tshirt.  I sometimes use tweezers to put these kind of things on my cookies -- and, yes, they are tweezers I use only for cookies;)
Let the cookies dry overnight.
Using a writing tip -- I like LOVE PME 1.5, write the name on the shirt.  I don't know why but when I use PME 1.5 my letters are so much better.  

Hockey strike or just for fun, if you make these cookies for the sport lover in your life, please let me know how they turn out.


Sunday, December 23, 2012

“Nice” Reindeer or “Naughty” Coal Chocolate Brownie Cookies


I’m not sure if I really like the whole “nice” and “naughty” list thing.  It’s a little creepy thinking anyone is being spied on and I don’t particularly like idle threats.  REALLY you are going to leave anyone a lump of coal?!?!  I think that is not very nice.

That is why these super yummy, KID FRIENDLY quick & easy cookies work well.  You can make cute reindeer or lumps of coal and either way they are a delish.

And here is how I made them.

Ingredients:

1/4 cup butter
1/2 cup brown sugar
1/4 cup unsweetened cocoa powder
1 tablespoon milk
1 teaspoon vanilla
1/4 teaspoon baking soda
2/3 cup all-purpose flour

Materials Needed for Decorating:

- candy eyes – you could use M&Ms or other candy
- pretzel twists for antlers
- brown M&M’s for the noses Dasher, Dancer, Prancer, Vixen, Comet, Cupid, Donner & Blitzen (that is EIGHT reindeer so you don't have to count;)
- red candies for Rudolph’s nose – I used Maynard Swedish Berries, but red Smarties, M&M’s or Jelly Tots will look super cute too

Instructions and Tips:

Preheat oven to 375.

Beat together butter, brown sugar, cocoa powder, milk and vanilla until well combined.

Beat in baking soda and flour.

Divide dough into 9 pieces.

To make the coal just crumple up the dough in whatever coal shape you would like.

To make the reindeer, shape into a triangular reindeer head and push pretzel "antlers" firmly into dough.  


Bake for 6 minutes.

Add eyes and nose as soon as cookies come out of the oven.  If the cookies are still hot the eyes and nose will stick to the cookie without using royal icing.
This recipe is perfect for one set of the eight reindeer plus one Rudolph but because I love the Swedish Berries I only made red nosed reindeer.

The cookies really do taste like brownies -- so naughty or nice -- everyone should have a happy holiday.

Merry Christmas!

Tuesday, December 18, 2012

Sorta Salted Caramel Chocolate Chips 'cause Santa is a Foodie


I’m quite sure that Santa is a foodie.  I truly believe that “between season” he spends lots of time sipping on ice wine while cooking and baking with Mrs. Claus.  I don’t want to spread rumors but I’ve heard he is into trendy venison burgers and cool maple bacon snowcones.  And I know for a fact that he would never turn down anything that incorporates the latest salted caramel craze.

You know I love that salty sweet thang – ala the Sweet & Salty Chocolate Pretzel Shortbread – and so does Santa.

So I made him these sorta salted caramel chocolate chip cookies and here is how I made them.

Ingredients: 

2 ½ cups flour
½ tsp baking soda
¼ tsp kosher salt (heaping)
1 cup butter, room temperature is best
½ cup sugar
1 ½ tsp vanilla
1 large egg
2 cups chocolate chips – milk or dark chocolate whatever you love
½ cup Hershey’s Skor Toffee Bits

Directions: 

Preheat oven to 3500.

Combine flour, baking soda, salt, chocolate chips & skor bits in a bowl.  Set aside.

Cream butter, brown sugar, egg & vanilla until fluffy.

Add flour, chocolate chips and skor bits on a low speed until flour mixes in.

Use a small ice cream scoop to make cookie balls about ¼ cup.

Place on parchment lined (always!) cookie sheets.  NOTE: The cookies spread quite a lot. I have large (16”x21.5”) sheets and I put 15 on each sheet (the recipe makes 30 large cookies) – so judge accordingly.
Bake for 12-15 minutes.

Remove from oven, let cool and place on plate for the big guy.  I used a “fancy” glass for his milk but these would also go very nicely with a glass of scotch (which Santa may really enjoy as he works so hard one day a year;)

My only fear with these cookies is that Santa may not leave to make it around the world delivering gifts, but make them anyways because they are so good.

Ho Ho Ho!

Saturday, December 8, 2012

Let It Snow!


I love snowmen.  They say winter in that fresh, fluffy snow way – not the cold, mushy, slippery way.  So these cookies just make me smile, want to pull out my skates, grab a hot chocolate and embrace the winter.

Last year I made gingerbread boys, girls and snowmen inspired by Bakerella, one of my favorite bloggers.  Last week I was making cookies for a baby naming similar to ones made by Bridgette from Bake at 350.  And then I thought I think I can combine the two styles to come up with my new favorite cookie ever – and it’s very Flour Child.

You can be as simple snowmen or fancy pants as you want with these cookies and here is how I did it.

Materials Needed for Decorating:

- large square cookie cutter (I used the large square scalloped one from Copper Gifts) – it is such a great cookie cutter that can be used in a kazillion different ways)
- gel past to colour some of the royal icing (I used royal blue)
- royal icing – as always, I really like the Ateco meringue powder
- piping bags
- sprinkles, coloured Tic Tacs and food writing pens

Instructions and Tips:


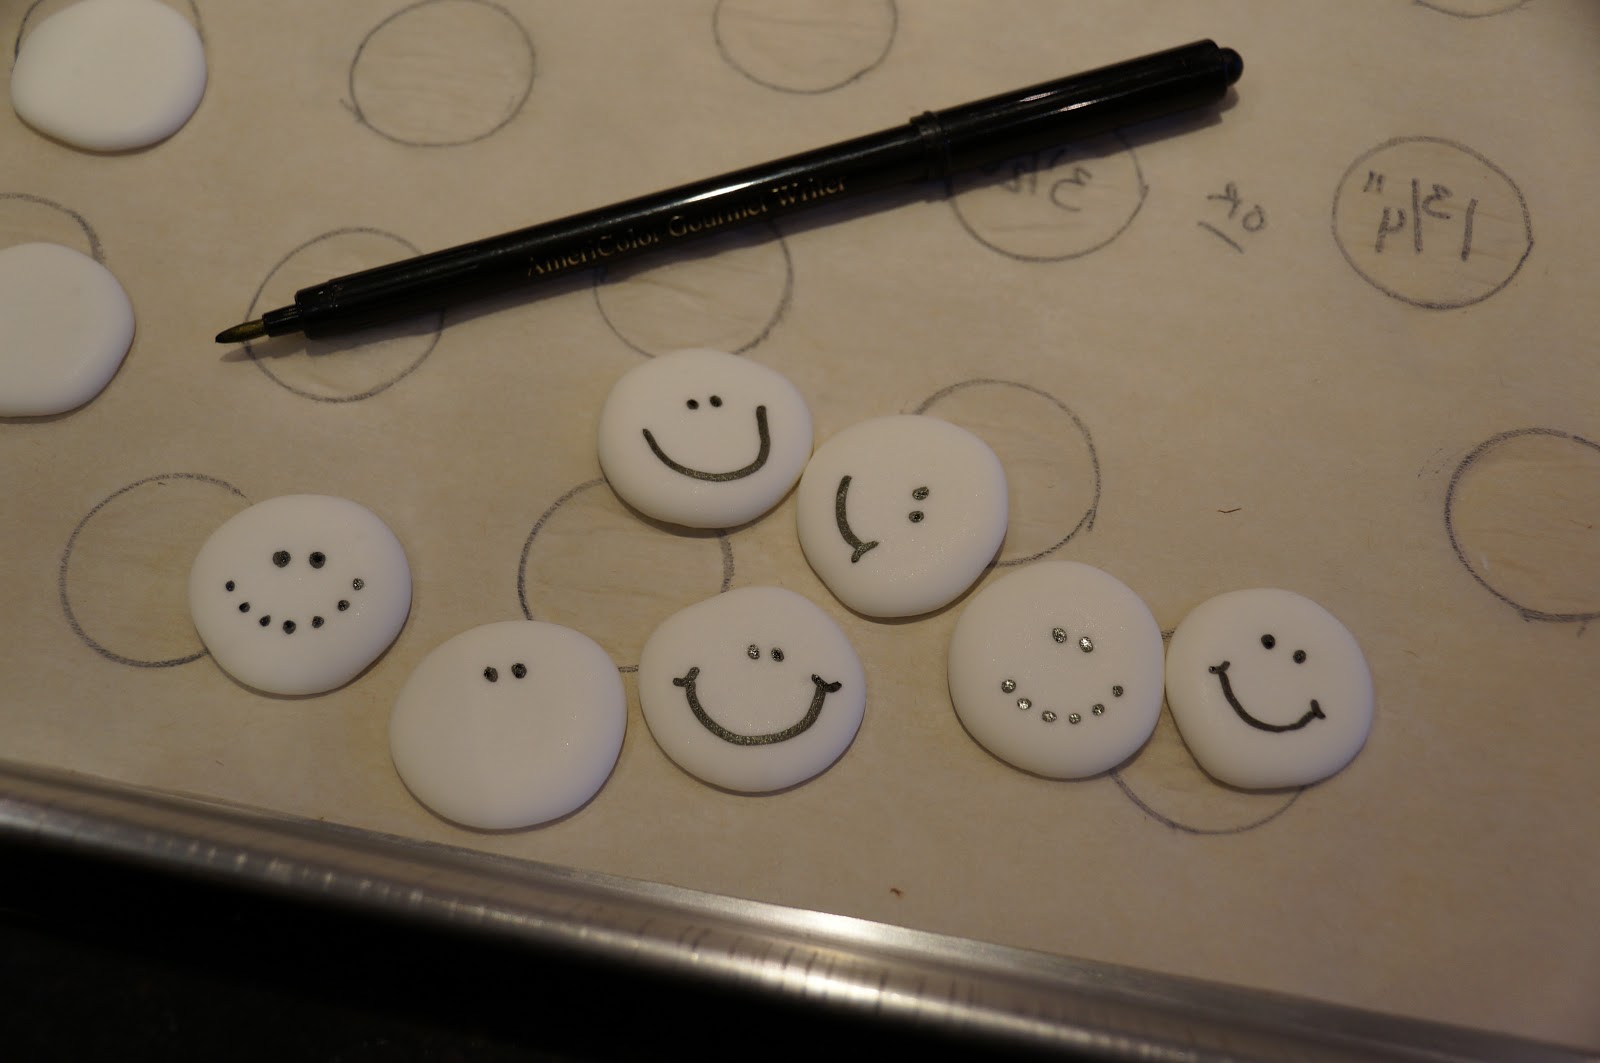
To make the snowmen heads. Draw circles on a piece of parchment paper.  I used a Sharpie and drew circles around 1¾” or 3½ cm.  Flip the paper over and trace with royal icing. Let them dry overnight.


Use a food writer to draw on the eyes and mouth.
Add sprinkles to embellish cheeks and facinators.  Tic Tacs are the perfect ear muffs.  I used white royal icing to add the sprinkles
Orange royal icing is the perfect carrot nose.

Use your favorite sugar cookie recipe and cut out the squares.

Outline each cookie with white royal icing
Fill or flood the cookies.  I like using the squeeze bottles because it is so much cleaner then a piping bag when flooding cookies.
Use a toothpick or bamboo skewer to pull the icing to fill the cookie.  If you just use the squeeze bottle there is a chance that you will overflood the cookie – it is always a fine line between the perfectly flooded cookie and a cookie that is over flowing with icing.  The toothpick “pull” really helps ensure an evenly flooded cookie.

Want another trick?  I use a Silpat when decorating cookies so they don’t slip around.

Place the snowman head in the centre of the flooded cookie.  I also used a few little snowflake sprinkles that I found at the local bulk food store.
Let the cookies dry overnight.

PME 1.5 is my favorite writing tip so I used it to write "Let It Snow" on each cookie.
I love the way these cookies turned out.
Now I'm just waiting for it to snow (sorta).