Tuesday, April 17, 2012

Tea Bag Cookie – Only In Canada, You Say?


A few weeks ago I posted these tea bag cookies on my Facebook page and there seemed to be a bit of interest in a tutorial on how to make them.  Sorry it took so long for me to get to it but I’m really glad I did.

I think these cookies would be a great addition to any Mother’s Day afternoon tea – don’t you agree?

They are very Red Rose, available, "Only In Canada, You Know?", and this is how I made them.

Materials Needed for Decorating:

- square cookie cutter
- drinking straw or some other small round to punch a hole
- royal icing – Again, I’m really into the Ateco meringue powder
- piping bags
- various brown (CK Products), gold (Wilton) and white crystal sugars
- caramels – Kraft (of course)
- black string licorice
- red flower for the tag

Instructions and Tips:

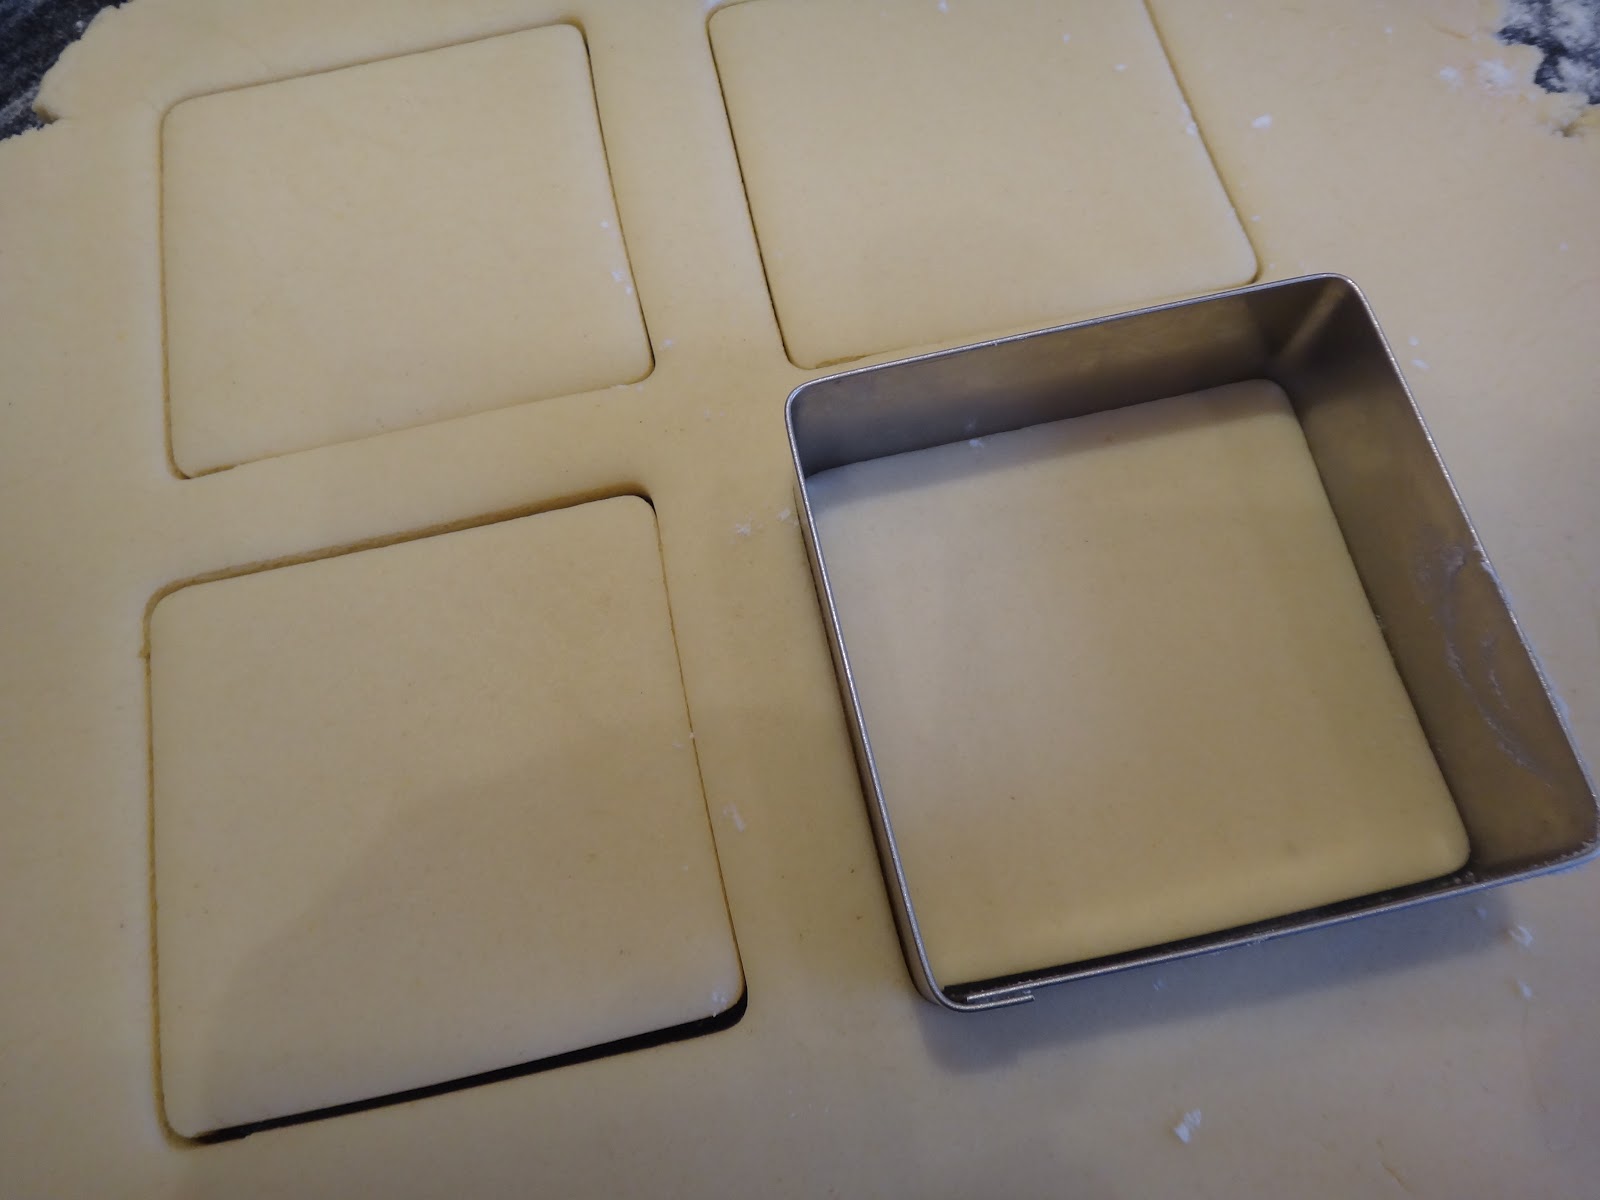
Use your favorite sugar cookie recipe and cut out the squares.  The cookie cutter can be between 2” to 4” depending on how big you want your cookies to be – I think the square I used was about 3”.

Cut two triangles (the edges) off the top of the tea bag.

Punch a hole for the black licorice string.

Cut a slit in the cookie wide enough to sit on the side of a cup.  It is good to make the slit a bit bigger than you think because it will shrink when it bakes.  Here I made the slit on the angle so that the tea bag would sit straight on the cup.

Once the cookie is baked and has cooled, outline in white royal icing and give time to dry.  I usually outline all the cookies and then go back to flood or fill them – this give the outline time to dry before I start touching them again.

Blend the different colour sugars together and sprinkle over bottom two-thirds of the tea bag cookie.  You could do this when the icing is still wet OR wait for the icing to dry and stick the sugar to the cookie by painting on clear corn syrup and then sprinkling on the sugar.  

Once the cookie is dry, add the licorice string and caramel tea bag tag.

Roll out the caramel.  If it is a little to hard to roll, put in the microwave for 3 seconds or so – if you put it in for too long it will melt.

Cut the licorice to about 2” and the caramel into a 1.5” strip – long enough to fold in half to make the tag.

Fold the caramel strip over one end of the licorice – it will stick together.

Use royal icing to “glue” on the flower and the licorice in the tea bag hole.

Let the icing dry.

Hang the cookie over the mug and enjoy with a great cup of tea.

I really love the idea of these mug cookies – they are very unique and can be as custom as the mug, person or occasion.  The concept of the “mug cookie” can work with a variety of shapes – just off the top of my head I think they could work with a heart, flower, donut…use your imagination and a world of possibility really opens up.  If you make them please let me know what you come up with.


Tuesday, April 3, 2012

Caramel Matzo Crunch


Passover starts Friday night.  Passover baking can be tricky.  Yes, yes everyone has a favorite flourless cakes or biscotti or meringue, but I have Carmel Matzo Crunch!  Well I like anything that is caramel so that is probably why I have a slight affinity for this recipe but it is also really delish.

It is a super easy recipe that does not require a lot of ingredients – and is really really yummy! 

And here is how to make it…

Ingredients

6 pieces of matzo
1 cup unsalted butter or unsalted Passover margarine
1 cup brown sugar, packed firm
3/4 cup dark chocolate or semi-sweet chocolate chips


Directions & Tips

Preheat oven to 3500.

Line a cookie sheet completely with foil and put parchment paper on top of the foil.  The caramel can get messy so take time with this step.

Line cookie sheet with matzo – 6 pieces fit perfectly on my 15”x22”cookie sheet but don’t worry about breaking pieces to fit on your cookie sheet (it is going to be broken into smaller pieces in the end anyways…).

Combine butter or margarine and brown sugar in a heavy-bottomed pot. Cook over medium heat, stirring constantly, until mixture comes to a boil. Continue cooking 3 more minutes, stirring constantly. Remove from heat and pour over matzo.  I used a spatula to carefully cover each piece of matzo with caramel. 

Place in oven. Bake 10 minutes, checking every few minutes to make sure mixture is not burning (if it seems to be browning too quickly, remove from oven, lower heat to 325 F, and replace)

Melt chocolate in a double boiler and then temper enough to put in a decorating bottle or you can simple use a spoon to drizzle chocolate on caramel matzo.

Remove caramel matzo from oven and drizzle boards with chocolate.

You can either leave the chocolate as is OR spread melted chocolate over matzo.

Chill in refrigerator until set and then break up and plate.

You can also use white chocolate, toasted almonds, dried cranberries, coconut or anything you love with caramel and chocolate (so the options are huge).

Happy Passover!

Sunday, April 1, 2012

Happy April, You Fools!

My iPhone rules my life.  It’s my main contact with the world outside my kitchen, plus I keep all my pictures of cute cookies and my cuter dogs on it! 

What could be better than my iPhone?  An iPhone cookie of course!

I put this picture on my Facebook site and had an offer to purchase my old phone and when I went for coffee with some friends they asked about my new phone (which I don’t have yet).  The whole thing was just a little April Fools Day thing.

Hope someone fooled you a little…

Saturday, March 24, 2012

May the odds forever be in your favour!

Did you read The Hunger Games or see the movie?

Obviously this cookie is a bit of an oxymoron but I could not resist...

No spoilers here.

What did you think?

Happy Reading!

Friday, March 16, 2012

Lucky Charms Treats - Magically Delicious


There is a little Irish in all of us, donchaknow?

So, in the spirit of St. Patrick’s Day which is on Saturday, I made Lucky Charm Treats (think Rice Krispie Treats with Lucky Charms).  I think it works -- the cereal is branded by a leprechaun named “Lucky” who has an Irish accent and is totally yummy.  

So I bought a box of Lucky Charms and was suprized to see how the cereal has evolved.   “Back in the day” (not really sure what day that was but when I was a kid) the marshmallows and Lucky’s tag line involved ‘pink hearts, yellow moons, orange stars, and green clovers”. Apparently (and by that I mean according to Wikipedia) older marshmallows have been phased out periodically. The first shapes to be phased out were the yellow moons and blue diamonds, replaced by yellow/orange pots of gold and blue moons respectively in 1994. In 2006, the assortment had changed to purple horseshoes; red balloons; blue crescent-moons; orange and white shooting stars; yellow and orange pots of gold; pink, yellow, and blue rainbows; two-tone green leprechaun hats; pink hearts (the only shape to survive since the beginning); with the most recent addition being the return of the clovers in 2004. The marshmallows also grew in size in 2004.

Whatever!  Lucky Charms are still totally fun and really MAGICALLY DELICIOUS when mixed with marshmallows so I made Lucky Charm Treats.

And here is how I made them.

INGREDIENTS

3 tablespoons butter or 3 tablespoons margarine
25 large marshmallows or 2 ½ cups miniature marshmallows
5 cups Lucky Charms cereal


Directions & Tips

Grease 9x9x2-inch pan.

Melt butter or margarine and marshmallows until smooth, over medium heat in a saucepan.  Stirring constantly to ensure they blend well and are smooth.3

Mix in Lucky Charms until well coated. Press into pan with buttered hands.

Cut into squares when cool.

Happy St. Patrick’s Day!

Wednesday, March 14, 2012

Let Them Eat Pi Cookies


One thing I have realized is there is a day to celebrate EVERYTHING!  Really!  Who knew that there is was a holiday commemorating the mathematical constant Ï€ (pi) otherwise known as Pi Day?

Pi Day is celebrated on March 14 or the 3rd month / 14th day date format, since 3, 1 and 4 are the three most significant digits of π in the decimal form.

I am no mathematician but I am a baker and love to find any excuse to make funky cookies so I made these Ï€ cookies.   

A real pie would have been too stereotypical don’t you think?  Did you do anything to celebrate the day?   Did you even know it was a holiday?

Happy Pi Day!

Sunday, March 4, 2012

Hamantashen Cookie Recipe


Everything I learned about baking, I learned from my Mom.  We had a big drop down counter in the kitchen and my Mom was always baking something and we were always welcome to help or just lick the beaters off the Sunbeam mix master.  Now if you ask my Mom where she learned to bake she will start to reminisce about Lillian Kaplun.  Lillian Kaplun was a woman who taught a generation of Toronto women, in the 1950s through 70s, how to cook and bake out of her Bathurst Street apartment and later in a storefront on Eglinton. 

Lillian Kaplun (1909-2005) leaves behind a rich legacy including a number of wonderful cookbooks.  My Mom has many of her books – For the Love of Baking (published in 1960), For the Love of Cooking (published in 1968), and For the Love of Entertaining (published in 1981).  In 1994 she put out Lillian Kaplun’s Kitchen and my Mom bought one for herself as well as my two sisters, my sister-in-law and me.  I would say this is a “best of” sort of book which I reference often, particularly if it pertains to a Jewish holiday or CHICKEN SOUP!

Purim is on Wednesday. This cute Sesame Street video tells the story of Purim and sorta explains the reference to the symbolic triangle of the holiday.  Haman, the villain of Purim, wore a triangular hat so that is why we make these yummy triangular cookies called Hamantashen.

I pulled out Lillian Kaplun’s recipe, called my friend Ellen for help and we made 20 dozen triangular fun filled cookies.

And this is how we did it.

Ingredients

COOKIE DOUGH

3 cups flour
1 tsp baking powder
2/3 cup butter, shortening or margarine
1 cup sugar
3 eggs
2 tbsp honey
1/8 tsp salt

Sift together flour, baking powder and salt.  Cream butter (or shortening or margerine); add sugar gradually and cream thoroughly.  Add honey and blend well.  Add eggs one at a time, beating well after each addition.  Fold in dry ingredients.  Chill for a few hours or overnight.

FILLING IDEAS

Prune Filling (Ellen’s favorite)
¾ cup chopped prune
¼ cup water
2 tbsp sugar
1 tsp lemon juice
½ lemon, zest of , finely grated

Combine ingredients in small saucepan. Cook over low heat until prunes are very soft. Puree with stick blender. Transfer to a small bowl, cover, and refrigerate until needed.

Poppy Seed Filling (my favorite and my late father’s too;)
¼ lb ground poppy seeds
1 tbsp lemon rind
2 tbsp lemon juice
1 cup honey

In a saucepan, combine all ingredients.  Cook covered over low heat for about 10 minutes or until thickened. Transfer to a small bowl, cover, and refrigerate until needed.

Lemon Filling
1 cup water
½ cup sugar
1 tbsp butter or margarine
6 tbsp corn starch
½ cup sugar
6 tbsp lemon juice
2 tbsp grated lemon rind
½ cup water
3 egg yolks, slightly beaten

Put 1 cup water, ½ cup sugar, and butter in top of double boiler and bring to a rolling boil.  Dissolve corn starch and ½ cup sugar in water; add to the double boiler mixture, cooking and stirring for 5 to 8 minutes.  Add lemon juice and rind, cook for another minute.  Add some of the hot mixture to the egg yolks, then return to double boiler mixture and cook another 3 minutes.  NOTE:  you don’t want the eggs to cook in the mixture but slowly blend int.  Pour filling into bowl, cover and refrigerate until needed.

Chocolate Filling
1 stick butter
4 ounces unsweetened chocolate, coarsely chopped
3/4 cup sugar
1 teaspoon vanilla extract
1/4 teaspoon salt
2 cold eggs
2 tablespoons all-purpose flour

Melt the butter and chocolate together in a double boiler, stirring frequently. Remove the top of the double boiler and add the sugar, vanilla extract and salt and continue stirring. Add the eggs one at a time, stirring to incorporate each completely before adding the next. Finally, stir in the flour and beat with a wooden spoon by hand for about a minute. The filling will turn glossy and begin to come away from the bowl. Transfer to a small bowl, cover, and refrigerate until needed.

Apple Filling
4 Granny Smith apples peeled and cored
¼ cup brown or white sugar
¼ tsp cinnamon
2 tbsp apple cider, apple juice or cream soda

In a saucepan, combine all ingredients.  Cook covered over low heat for about 10 minutes – until apples are lightly cooked but still fairly firm. Transfer to a small bowl, cover, and refrigerate until needed.

Jam Filling

Use your favorite jam – just make sure it is a pretty thick jam so that it does not spread too much.

Directions & Tips

NOTE:  Prepare cookie dough (each batch makes around 2½ dozen 3” round cookies) and the fillings in advance.  Then get set for putting them together. We made A LOT of cookies so used prune, poppyseed, raspberry jam, lemon, chocolate & apple fillings.  You may want just one or two fillings so you may need to adjust the size of the filling recipes based on the amount of cookies you are going to make.  
 
All recipes aside, you could also purchase fillings at a local Jewish bakery. Then you can get a little bit of each filling and just make a batch or two of cookie dough.  Whatever you do, have fun because Purim is all about remembering and celebrating. 

Roll out dough 1/4” thick.  Cut into 3” rounds.  Put 1 tsp. filling on each piece. 

Fold into a triangle, pinching edges together.  


Place on parchment lined baking sheet.  Bake at 3500 for 15 to 25 minutes or until golden brown.


I rolled and cut, Ellen filled and pinched (she really has a nice pinch).  It was great to have a partner in making these cookies -- thanks Ellen for all your help!